Wednesday, November 21, 2012

Appetizer Series: Stuffed Mushrooms

Anything stuffed into a mushroom is a winner in my book. We have all been to parties where there are cream cheese stuffed mushroom topped with bacon and I am by no means meaning to disresepct this old, southern appetizer. In fact, if you are having a party that I am invited to, please make these as I do love them. Sometimes it is fun to add an interesting twist to this classic though so I decided to give these a shot. The recipe is courtesy of Ree Drummond, The Pioneer Woman from the Food Network.

Stuffed Mushrooms Recipe
1 package white mushrooms
1 tsp. minced garlic
1/2 cup kalamata olives
1/2 cup sundired tomoatoes
1/4 cup parsley (optional)
Bite-sized fresh mozzarella
A few handfuls of plain bread crumbs
3 tbs. butter


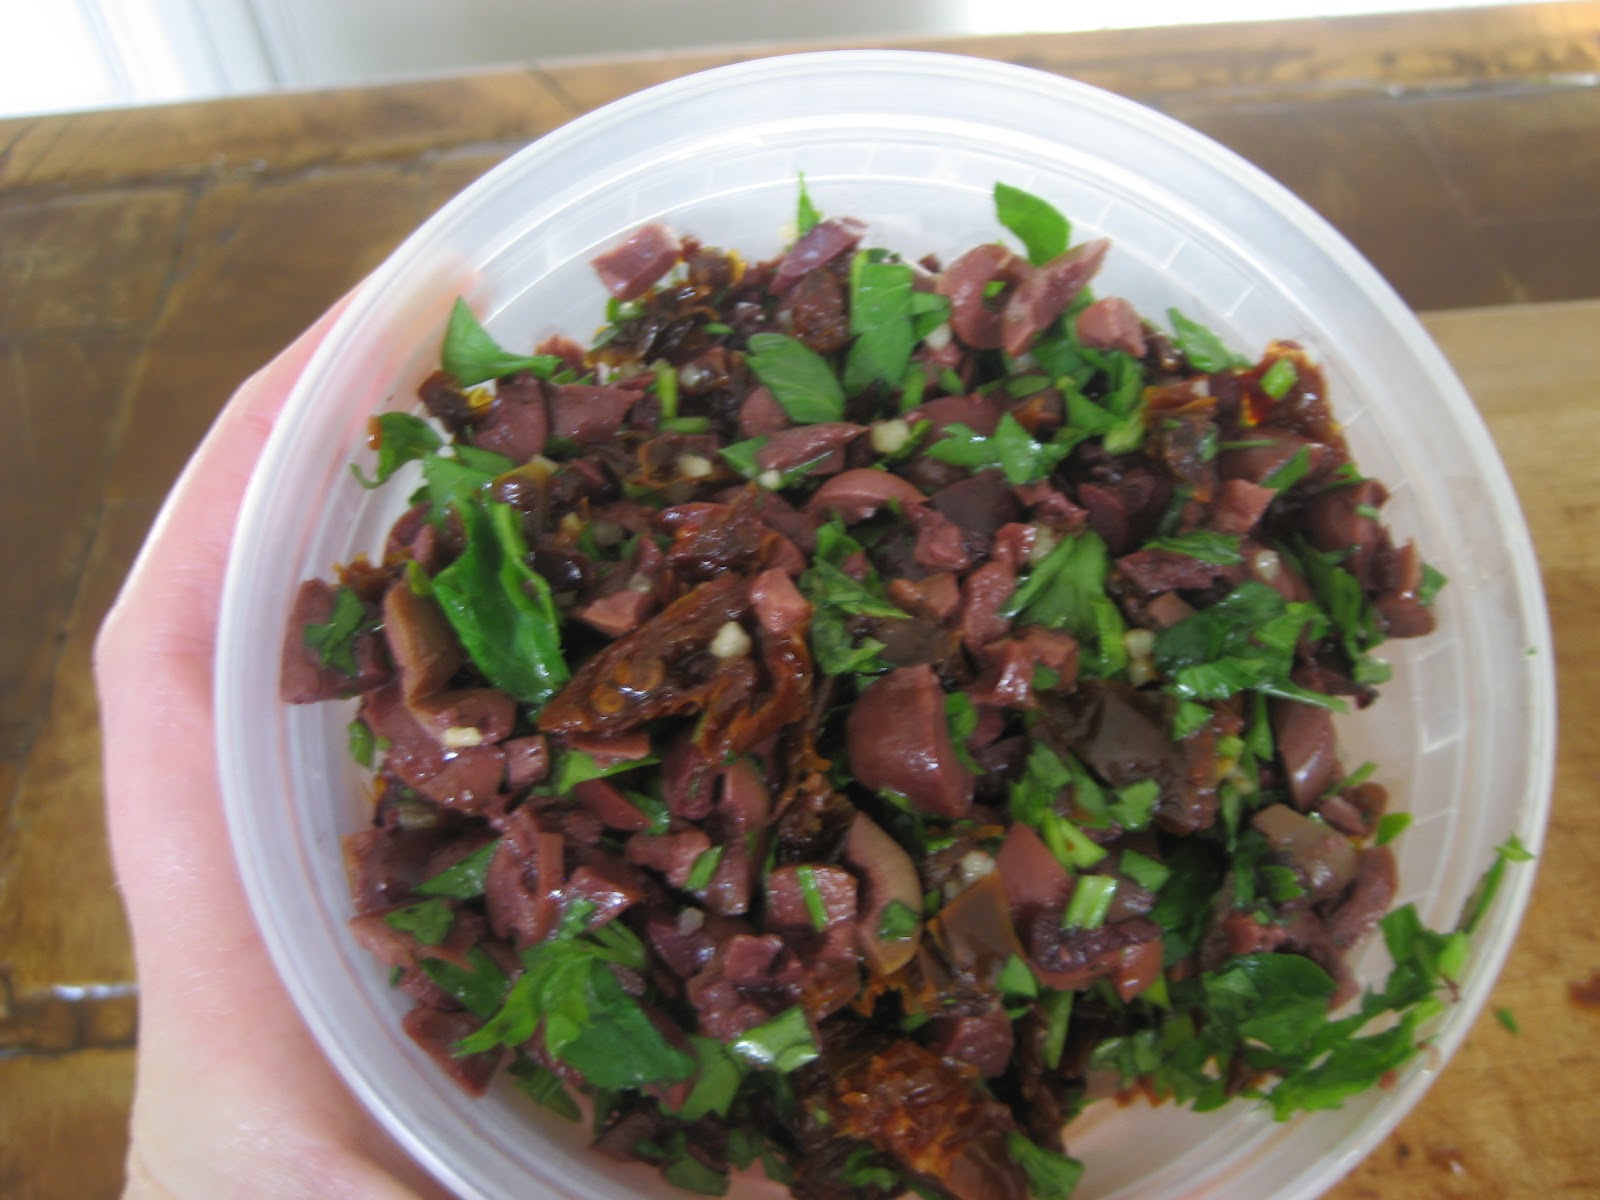
Chop olives and sundried tomatoes then combine with garlic & parsley
 
Slice bite-sized mozzaralla in half
 
 Heat butter in a saucepan then toss mushroom caps in butter for about two minutes. Remove the mushrooms and, in the same pan, heat olive mixture for a minute or two
 
 Place mozzarella half into each mushroom cap. Top with olive topping. Since not everyone loves the strong taste of olives and sundried tomatoes, I decided to make half of them plain. Generously cover each mushroom with bread crumbs. Bake at 350 for 15 minutes. 
 
As soon as you remove them from the oven, sprink them with sea salt. 
 
These are so delicious and easy to make. Honestly, they are heavenly when served warm but are still pretty tasty once they have cooled off too.  
 
If you have any leftover after your party, chop & toss into a pasta mixture. Delish!!


Have a wonderful Thanksgiving holiday everyone!!


Monday, November 12, 2012

Appetizer Series: Bourbon Bacon Toast

Here's the deal, I actually hate cooking. I don't mind preparing things, like a fabulous salad or chicken salad or egg salad. Basically anything that you can mix up with mayo & it automatically tastes delicious. My mashed potatoes are amazing but, let's face it, they're pretty hard to messs up. I can also order like none other. Ever tried White Chicken Chili from Roasters (Atlanta friends)? It's delicious, inexpensive and ready when I want it.

That being said, my husband & I do try to cook on Sundays. Mainly, I am the sous chef, he then makes a huge mess, we eat (around 9:00 p.m.), and I clean. I recently decided that, while I am not talented in the main dish or side dish categories, I may actually have an inclination for appetizers. This would serve two purposes:
1. I would get to try out new recipes without the fear of ruining an entire meal
    2. I could get something yummy in my tummy before it is bedtime!

This month, I will show you three of my favorites, starting with BOURBON BACON TOAST. How delicious does that sound? And you know if I am making it, it must be easy! I hope you will give it a try.
Bourbon Bacon Toast Recipe
1 loaf of wheat bread
2 tbs. bourbon
1 jar mango chutney
1 lb. bacon


No, I didn't actually use all of the bacon shown. The day before I had made some deviled eggs. If you've never sprinkled bacon on your deviled eggs, give it a shot. It is fabulous!!


I actually paired down the recipe to meet my needs. I mixed 1 tbs. bourbon with 4 tbs. mango chutney...yes, I see that my bourbon to mango ratio is probably higher than it should be.


I used a measuring cup to stamp out the wheat bread, topped it with the mixture & added a generous amount of bacon.


I then put it under the broiler for 3 minutes. This is what happened:


Seriously, this is not new to me. How on earth does one burn something in a mere 3 minutes? I am cursed!

I had slept well the night before so I didn't have a complete meltdown (ha ha!). Since I had plenty of ingredients leftover (loads of bacon!), I immediately tried again. This time, I put it under the broiler for 2 minutes, which was perfect. Look how pretty!


Next time, I think I may heat the bourbon/chutney mixture for 30 seconds in the microwave to help it heat through since it is in the oven for such a short time.

I hope you will give this a try. And if you burn it to a crisp, I hope you will try it again! :)


Wednesday, October 31, 2012

HAPPY HALLOWEEN!!

As you may know, I have always loved dressing my puppy Mardi up for Halloween. Let me just say that a few things;

A. The new puppy, Marlin, apparently doesn't have a festive spirit/like wearing outfits

B. Getting them both dressed & in the same picture was impossible. Regardless, enjoy my effort and a few other Halloween treats!

Can you guess who they are going as?


If you guess Rod Stewart and Rachel Hunter, you are correct!!


Have you wanted to try those new Sally Hansen stick on nails? I LOVE these! They were super-easy to apply & have stayed on for 5 days thus far.  I can't wait to see what styles they have for Christmas...maybe something with snowflakes?

A simple front door display 

Adorable baby pumpkins that served as a centerpiece for the October baby shower I hosted.


A blast from Halloween's past:


Sunday, October 28, 2012

How to (not) Make Your Own Fall Wreath

This October, my husband & I hosted two mother in law visits, a visit from our 7 year old niece & nephew accompanied by a sister & brother-in-law and a couples party (aka: a couples baby shower)  I decided that I needed to step up the decorating a notch & thus decided that my front door needed a wreath. I love doing a fresh spruce Christmas wreath, and didn’t want to be too Halloweeny, so I focused on something that would take me from late September through Thanksgiving.
One thing you must know about me is that I am not a huge fan of silk flowers. However, something happens to me when I walk into a craft store. I turn into a third grade teacher, (no offense to third grade teachers), and I start wanting to be-dazzle everything, buy cute stickers that I will never use and yes, I always look at the silk flowers. That being said, I am not particularly skilled in the area of creating décor as evident by a white feather Christmas tree I made several years back. It was supposed to be angelic with a funky twist. It just looks weird, but I still display it in the WAY back of my Christmas tree collection. Knowing that this may turn into a disaster, I turned to the Internet for some inspiration. I really liked several of the options I found:


Ultimately, I decided to give this one a try:
 
I purchased a grapevine wreath on sale for $2.99 & the rustic floral filler cost just under $22.
 
I started by adding wraping burlap at the top for a guide so I could work
my way around keeping focus on the middle/top.
 
I then began placing each of my lovely, rustic looking silk flowers & tying them with florist tape.
 
About halfway through, I took a look at my little creation & decided that it looked terrible. Not in a cute little 3rd grader way, but in a really, really bad throw it away kind of way. Sooooo, I made the decision to painstakingly remove each section and just keep it simple. I think it turned out nicely.
 
 
I certainly hope you all have had a lovely October. Mine has been so much fun and oh so memorable. This November you can find me relaxing in front of the fireplace with a cup of hot tea, reading a great book. P.S. Shoot me an e-mail if you know where I can purchase a beautiful wreath for next Fall, ha ha! :)
 

Monday, October 1, 2012

A Special Halloween Treat

One of my absolute favorite things about our new neighborhood is that we get Trick Or Treaters...LOTS of Trick Or Treaters! I am not sure who enjoys it more, me or my sweet puppy Mardi. This year, we have added a new dog to our household (Marlin) & I cannot wait to share a picture of them dressed in their Halloween costumes! I love seeing all of the adorable kids in their costumes and, of course, having lots of candy on hand. Several of my friends bring their kids by & I always like to have a special treat ready to go for them. Check out what I did in 2011...who knows what I will do this year!

I thought these Martha Stewart witches brooms were super-cute, and could work for a boy or a girl. I bought mine at Michael's Craft Store for around $10 but you can get them anywhere that carries Martha Stewart's line of crafts. I checked, and they are making these again this year.

Of course it comes with directions,
but I always find it helpful to have a visual.
It comes with an inside bag & an outside bag.
You just put a little sticker between the two to hold them together.
Drop in the candy & broom stick, then tie it loosly at the top.

How great are the mini Tootsie Roll pops? 

I hope someone's kiddo will bring me another spider ring this year! 

The broom stick is faux but, obviously, this isn't for small children. They can untie the ribbon or they can tear the sides to get to the candy. 

With one of my leftovers, I made a bird's nest.
I cannot tell you how much fun this was to make!
 I just twisted the sides of the bag in various directions & glued the pieces into place with hot glue.
I then added spanish moss and feathers.
What on earth am I going to do with this you ask?
I have no idea, I just like it ;)


HAPPY HALLOWEEN!!

Here are some of Mardi's past Halloween costumes:
A CUTE COWGIRL

AN ALABAMA CHEERLEADER 

Monday, August 6, 2012

Back to school treat for teacher?

Looking for an inexpensive, yummy treat that will make you look like a creative chef? Look no further! I started making these little treasures a few years ago & have taken them as hostess gifts for many a dinner party. Recently, I took them to a friend when I met her precious new baby for the 1st time. They are delicious!!

Thank you to my dear friend Jeana for always having these at her house for our JLA meetings...and then teaching me how to make them :)

All you need is a bag of rolos, a bag of square pretzels, a pretty jar,
 a piece of ribbon & about 1/2 hour

Preheat the oven to 350 degrees


Spread out the pretzels on a lined baking pan


Open the rolos (I think this is what takes me the longest)


Cut the rolos in half


Place the rolos chocolate side down on the pretzels


Bake for 2 minutes (seriously, just 2 minutes!)


The rolos will become shiney when they are heated properly


Once you remove the pan from the oven,
place the 2nd half of the pretzel on top & press lightly


You can either let them cool on their own for several hours or
place them in the freezer for 2-3 minutes


Look how cute this is! It sounds so simple but, no kidding, everyone asks me how to make these. Little do they know that besides these, all I can do in the kitchen is prepare a fabulous cheese platter!
 
Blog Template by Delicious Design Studio