Monday, November 25, 2013

HOLIDAY GIFT GUIDE 2013


$10 Gift Idea- NAIL STICKERS
 
If you haven’t gotten into this craze, the holidays are a great time to start. I first tried these for Halloween last year, then for Mardi Gras. But, honestly, they aren’t just for unique celebrations. They come in an array of “normal” colors and they truly do last for about 5 days. If you are like me and never seem to have time for polish to dry, you will love these. Oh wait, this is supposed to be a gift blog so, um, buy one and try one?

Available at:
 
 
$25 Gift Idea- OLIVE OIL MISTER
 
Everyone cooks with olive oil these days because it contains “good fat”. Sometime we, myself included, just pour on the good stuff without thinking about it. A dear friend of mine suggested this product to me and I think it is a brilliant and unique gift in that perfect price range!
Available at:
 
$50 Gift Idea-PERSONALIZED CANVAS PRINT
 
One of the best parts about the holidays is receiving tons of Christmas cards featuring everyone’s adorable kids (and pups) in the most beautiful, professional pictures. I think Olan Mills was the most professional shots I had done as a kid and I’m sure those entailed some horrific marble background but I digress. Truth be told, sometimes, the pictures that I see posted on Facebook are just as good and definitely more natural and fun. I love that Kinkos now has the ability to print your snapshots directly onto a canvas. This gift will have the” aww” affect you are searching for!
Available at:
$75 Gift Idea-BARK BOX (3-month subscription)
 
We all know that I am a tiny bit obsessed with my cute pups.  If you know of someone like me, you have to get them a subscription to BarkBox. It is just like BirchBox (http://www.birchbox.com/) but for pets. Each month a new box arrives with treats and toys galore. This is a must for the pet lover in your life. They will LOVE it!
 Available at:
 
 
$100 Gift Idea- AGATE COASTERS
 
When I was a little girl growing up in the country, I collected rocks. Pretty exciting huh?  I always wanted to live in a neighborhood around other people but, the truth is that growing up isolated like that allowed my imagination to really flourish and grow. I thought that the rocks I found were little treasures and I would just sit and stare at them for hours. I still have my collection so, whenever I see something that features rocks, I am just naturally drawn to it.
And yes, I am listing coasters in the $100 range suggestion this year. What can I say? Sometimes you just have to go a little overboard for the person in your life that has everything.
Available at:

Tuesday, November 19, 2013

A Headboard Project

My husband & I love a project that allows us to re-purpose something & make it better. About a year ago, we came across a booth at Scott Antique Market, (www.scottantiquemarket.com), that had headboards made out of old doors. We loved & it decided that we should consider making one ourselves. We have completed two previous "door" projects so I guess you could say this is our thing. In case you missed the first two door projects, here you go: http://www.pixiedustatlanta.blogspot.com/2012_03_01_archive.html

Some dear friend's of ours were renovating a historic 1920's home in Nashville which included replacing their interior doors. Never one to miss an opportunity for a project, my husband asked them if we could one of them. As luck would have it, they decided to move back to Atlanta shortly thereafter & brought the door to us. Thanks Betsy & Clay!

This project was very difficult to say the least. It took a lot of planning, materials, tools, tweaking and patience. My husband & I worked together to make this happen and we are so happy with the end result. Enjoy and rest-assured that all of my remaining projects for 2013 will be very light in nature ;)

The original door
 
We hired a very capable Project Manager (and he is cute to boot)
 
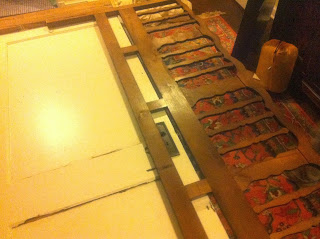
The first few weeks were handled by my husband & entailed things like this:
 
And this:
 
 
And this:
 
Gotta love a great sanders that your renter leaves behind...
 
At this point, we thought we had made progress:


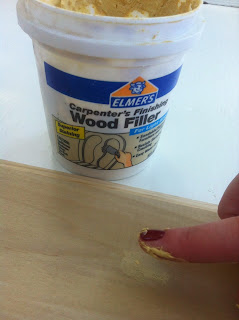
It was my turn to fill in nail holes:
 
Sand a bit more:
 
Stain the posts (4 coats of grey stain):


Wax the posts (4 coats)
 
And apply the antiquing glaze:
 
After all that, the door looked like this. I went a little over-board with the antiquing glaze. Darn it..


So, I brought in a backup for advice:
 
Luckily, I had a nice acrylic paint on hand in a yummy buttermilk color:

 
I sponge-painted the entire door to soften the "dirty" look. I then went back & added more buttermilk paint just to the center of each piece to make the edges appear darker:
 
We're almost there:

This is the headboard we have been using for many years. It belonged to my husband's family so we wanted to incorporate it into our new headboard:
 
 
We carefully attached it to the back of the new headboard:
 
 
After up-righting it, we attached it to the wall:
 
And we LOVE it!! 


Blog Template by Delicious Design Studio